hexo 搭建博客学习经过只是作为自己的经验总结,并不作为教程使用,主要是将博客搭建在 github 上。里面包含自己搭建博客的一些踩的坑,虽然不是很全面,但是可以大概了解。
前言#
如果大家想要了解hexo,可以去hexo官方文档看一下,这里主要以纯教程为主。以下的博客搭建主要是在 windows 下进行,搭建需要NodeJS和git,强烈推荐在 CSDN 上搜索就会有一大堆详细的教程,前期还需要准备一个github账号,但是对于第一次安装 git 需要仔细一点,最好找一个全面的教程一步步跟着做,这些我没有写的但是提到的步骤我都会列在我的文末参考资料。
实践操作#
Github 账号#
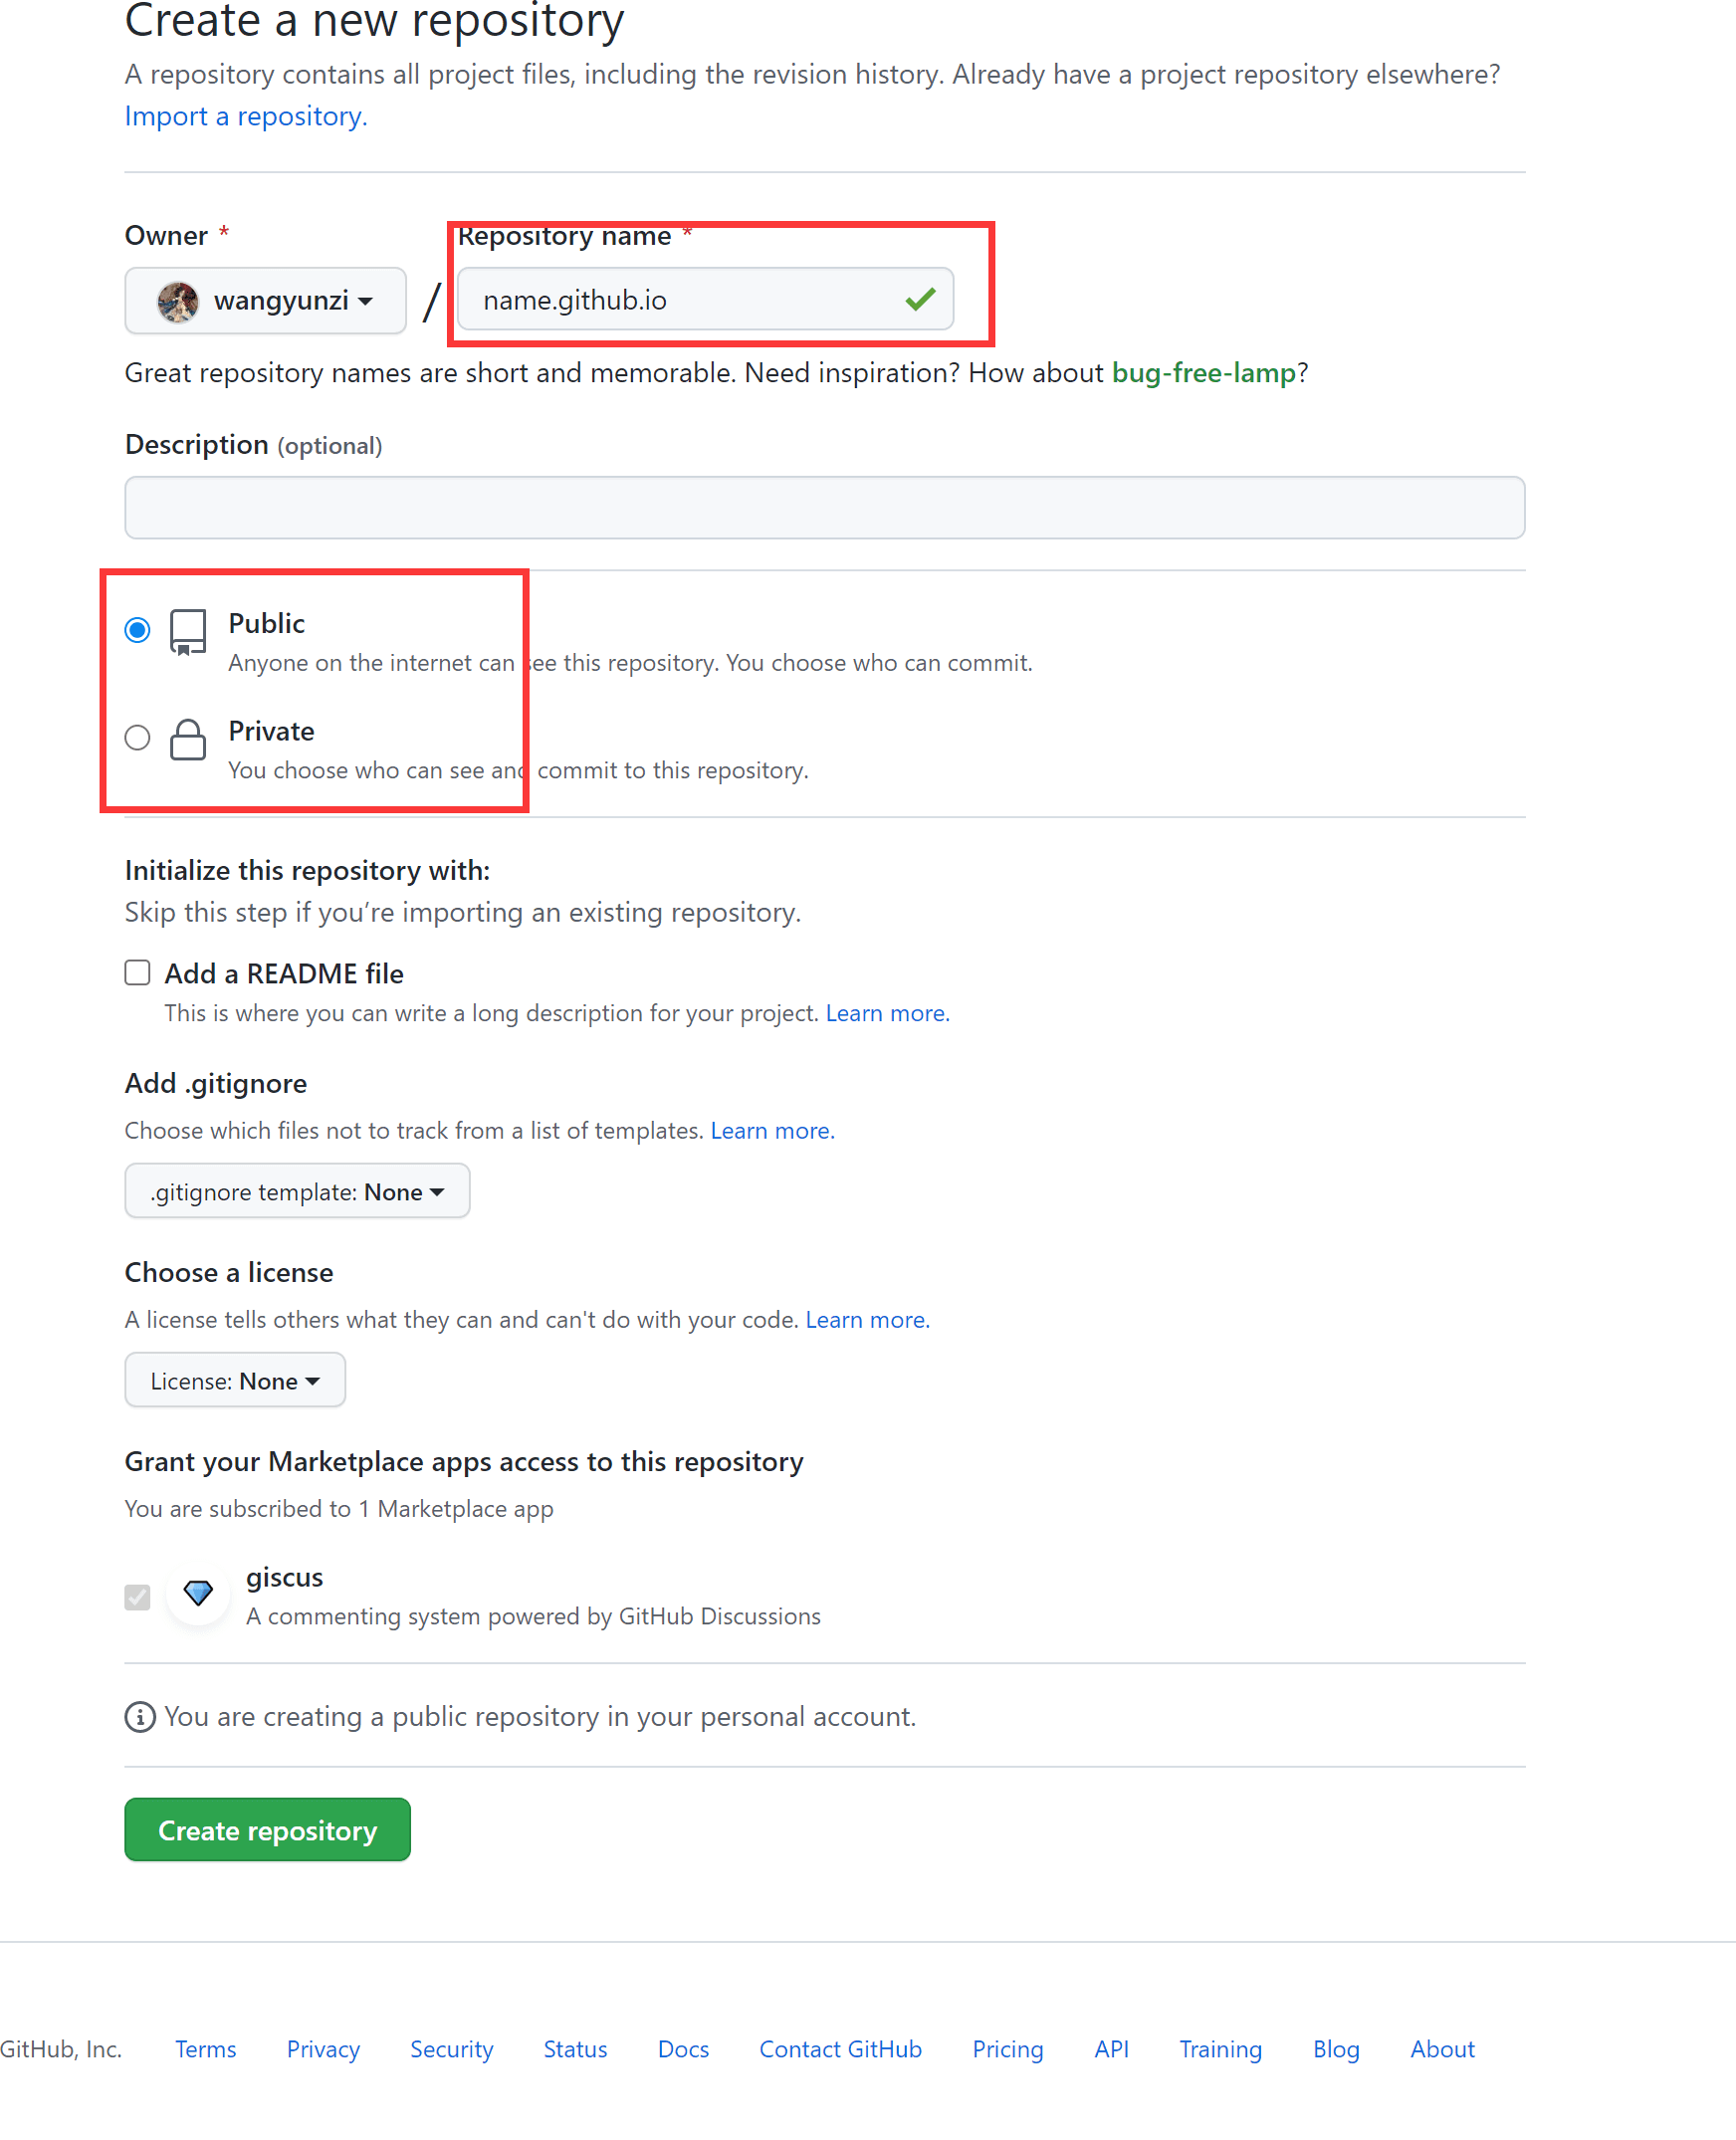
创建一个 GitHub 账号,新建一个仓库,仓库名字一定要写成name.github.io这样的形式,name 可以随便改,选择选择 public,然后创建仓库。
安装 hexo#
1. 打开电脑终端输入以下代码:
npm install -g hexo-cli
2. 查看 hexo 版本:
hexo -v
3. 此时创建一个博客,我的博客是安装在 D:\Blog 下面的,你们也可以选择自己喜欢的目录下进行(myblog 博客名称,可以更改)
hexo init myblog
4. 进入博客
cd myblog
5. 安装 npm
npm install
6. 生成静态文件
hexo g
7. 本地测试
hexo s
此时一个简单的博客就完成了。
安装主题#
hexo 博客官网有很多主题,也可以在 github 上直接搜索 hexo 主题 ,可以选择一个你最喜欢,我用的是 volantis 主题。以下步骤在 D:\Blog\myblog 下进行
1. 依然是终端打开博客,将主题下载下来
git clone https://github.com/xaoxuu/hexo-theme-volantis themes/Volantis
2. 安装依赖包
npm i -S hexo-generator-search hexo-generator-feed hexo-renderer-less hexo-autoprefixer hexo-generator-json-content hexo-recommended-posts
3. 打开博客目录(D:\Blog\myblog)下的配置文件_config.yml, 然后找到如下代码:
## Themes: https://hexo.io/themes/
theme: landscape
将 landscape 改为 volantis。
4. 接下来就是艰难的主题修改了,用的啥主题就是看主题文档,看着给的提示修改。
部署到 Github#
1. 打开上个步骤目录下的配置文件_config.yml,然后找到如下代码修改:
deploy:
  type: git
  repo: git@github.com:wangyunzi/wangyunzi.github.io.git(仓库地址,如下图)
  branch: master(分支)

2. 安装插件:
npm install hexo-deployer-git --save
3. 由于安装 git 步骤已经跳过,默认你已经安装成功了,本地与远程已经部署好了,所以接下来输入以下清除缓存文件db.json和已生成的静态文件 public
hexo clean
4. 生成网站静态文件到默认设置的 public 文件夹
hexo g
5. 部署网站到设定的仓库
hexo d
6. 创建文章
hexo new post 第一篇文章
输入以上代码就会发现在 source 文件夹下的 post 里面就会有 “第一篇文章” 这个 md 文件,编写内容。
7. 提交文章和部署到文章差不多,依次输入下面的代码:
hexo clean
hexo g
hexo d
到此,博客就布置的差不多啦。
部署到 github 和 vercel#
由于后来安装的博客越来越多,发现继续使用 name.github.io 这个行不通了,具体原理我也说不通,后来虽然我发现也可以布置两个这样的博客,但是有点复杂,就果断选择放弃了,于是选择将文件 push 到 github 上,然后 github 与 vercel 链接,这样 vercel 就会给你一个类似 name.vercel.app 这样的免费域名,在 vercel 上你可以拥有无数个博客,这也是我后来逐渐喜欢上 vercel 的原因,最后我发现可以不 push 到 github 上,直接 push 到 vercel 上,这也是一个非常不错的办法,在我末尾的参考文献可以找到。(此部分可以选择看或不看)
1. 同样,新建一个博客,可以私密也可以公开,我建议最好设置成私密的。

2. 初始化博客,然后你就会发现博客目录下多了一个.git文件
git init
3. 接着输入一下代码,这是第一次 push 到仓库的步骤:
git add ..
git commit -m "first commit"
git remote add origin git@github.com:wangyunzi/a.git
git branch -M master
git push -u origin master
git remote 部分输入自己的仓库 ssh,就是前面步骤提到的那个,“first commit” 可以改成其他的,这个表示提交名称,提交之后会在仓库上看到。
4. 如果以后修改博客或是提交文章就可以直接输入以下步骤:
hexo clean
hexo g
git add ..
git commit -m "first commit"
git branch -M master
git push -u origin master
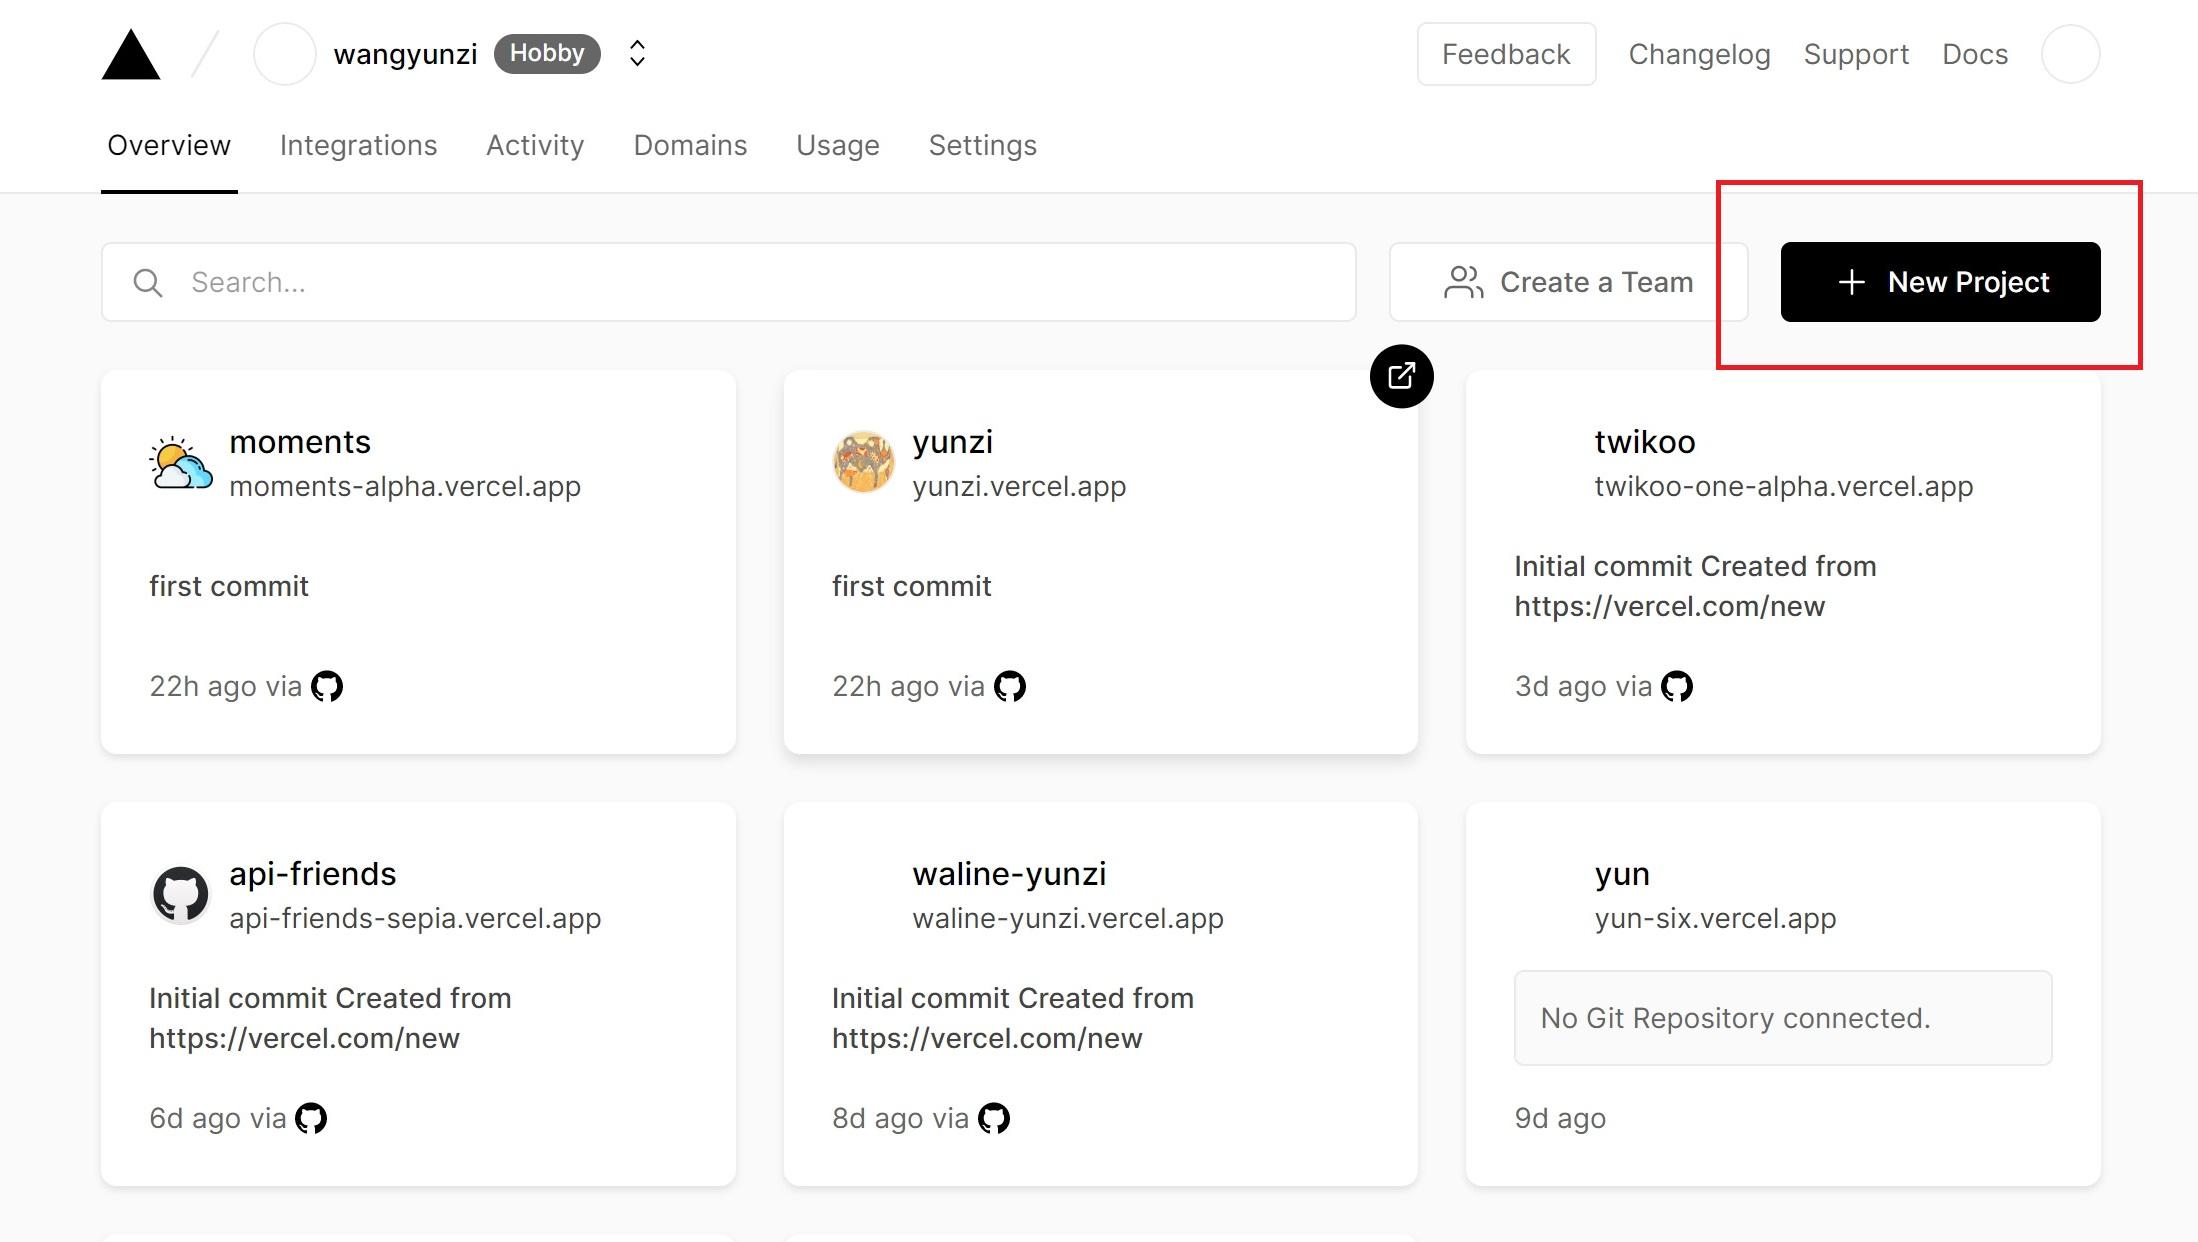
5. 上面我们已经将博客 push 到 github 上保存好了,接下来就直接和 vercel 连接起来,登录的时候就用 github 的账号登录这样方便快捷一点,然后新建一个项目:
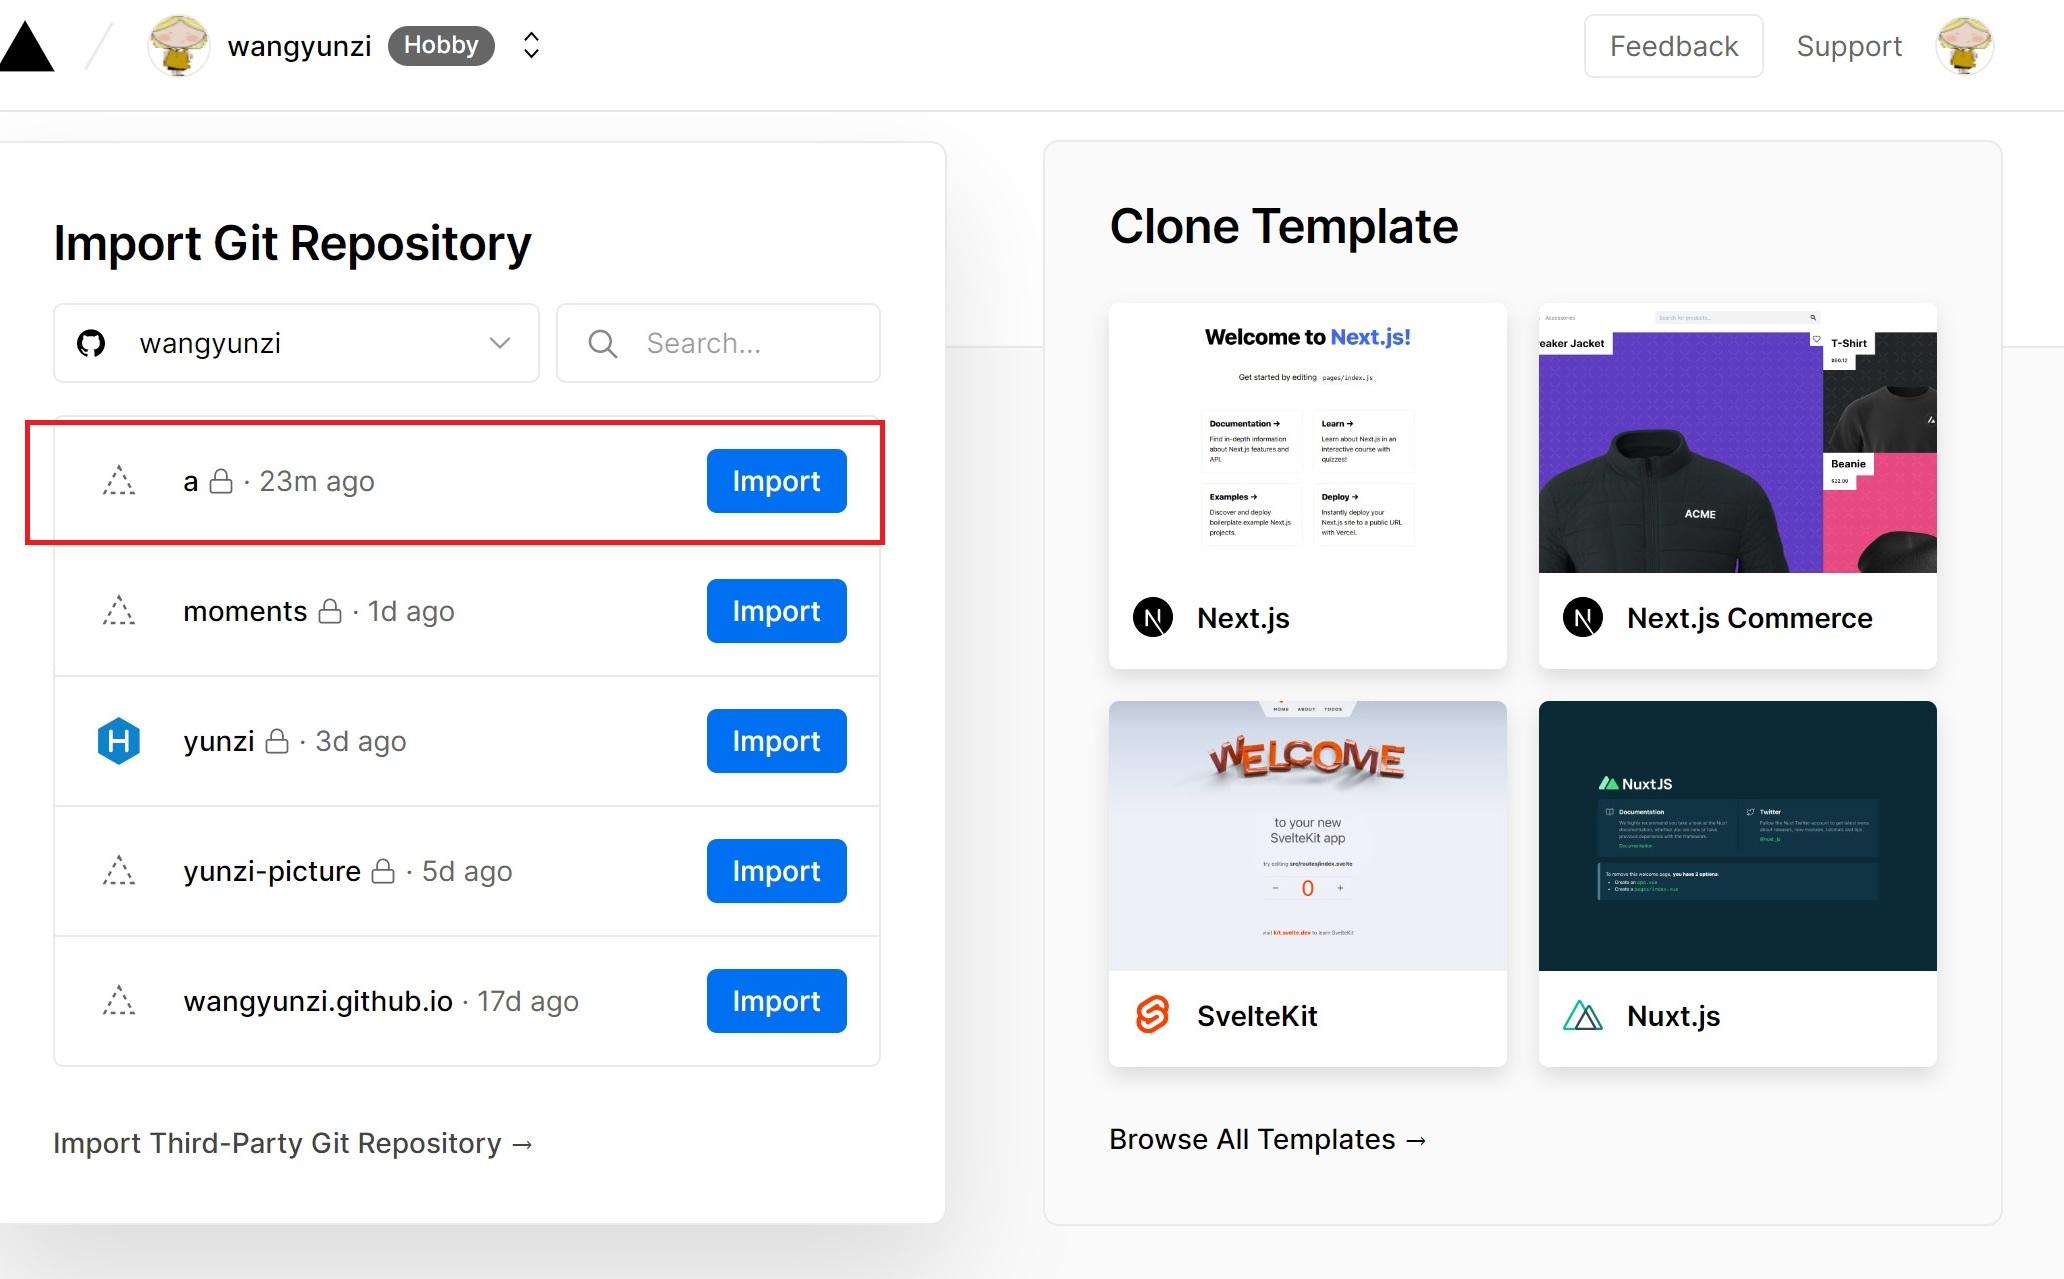
6. 导入我们刚刚创建的 github 博客
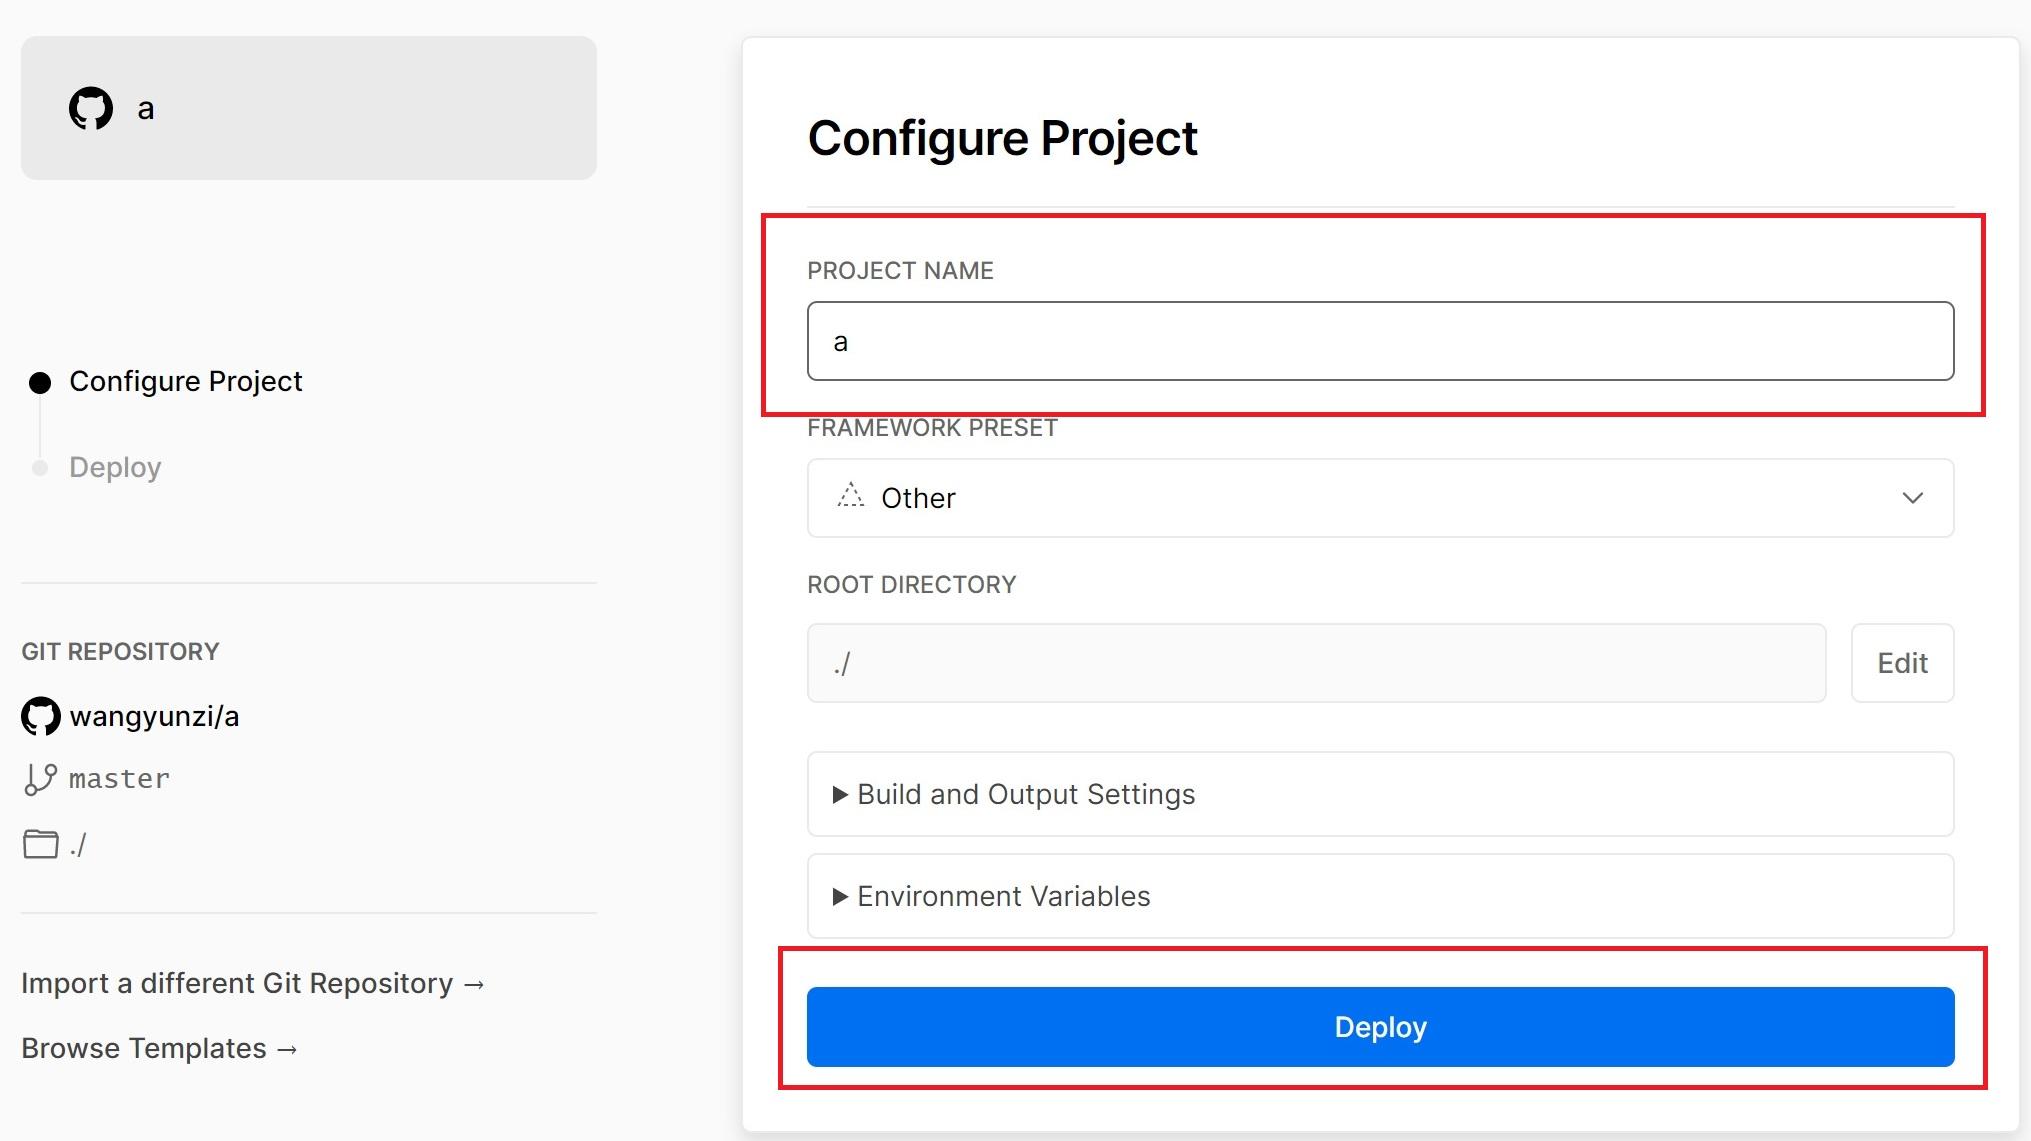
7. 填写名称,这个名称就是你网址前面部分名字,比如我的博客网址 yunzi.vercel.app 在 vercel 上的项目名称就是 yunzi,然后 deploy,稍等几分钟就会出现一个页面写着 congratulation,说明成功了,回到项目主页:
8. 打开网址看一下,这样以后别人打开你的这个网址就看到你的博客啦:

直接部署到 vercel#
虽然在参考文献里面已经有了一篇比较完整的文章了,但是我在按照步骤进行的时候还是出现了一点小问题,主要是我实际操作和他的有一些不一样,所以我来捋顺一下我的整个步骤,为此我新开了一篇 hexo 博客演示😂😂。
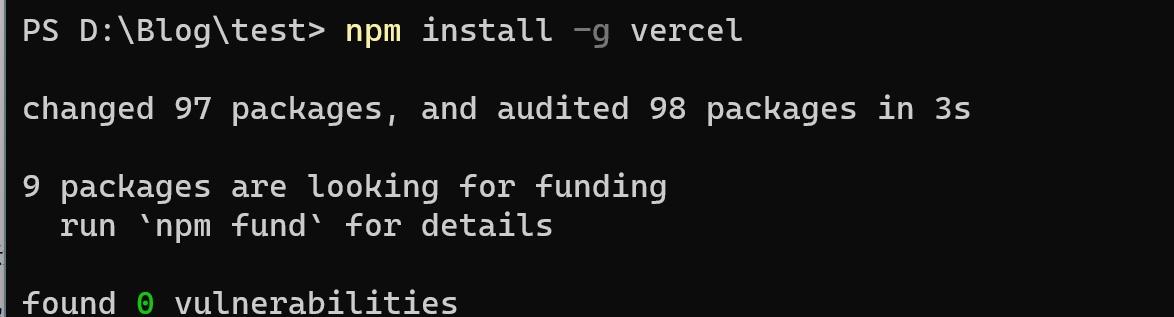
1. 首先安装 vercel
npm install -g vercel
2. 生成 hexo 静态文件
hexo g
3. 按照教程是要求到 public 下进行的,但是我那样操作后有错误,所以直接在博客目录下进行以下步骤即可,输入代码:
vercel
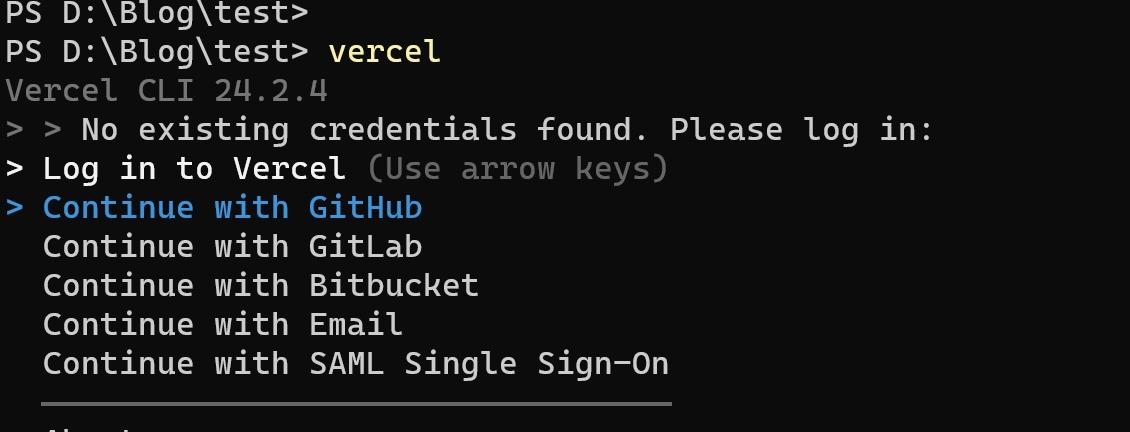
直接点击enter,因为前面我们是使用 github 登录的,我没使用过下面几个选项,想尝试的可以尝试,接着就会在浏览器出现让你使用 github 账户登录的页面,有些可能不会出现,接着就会出现:
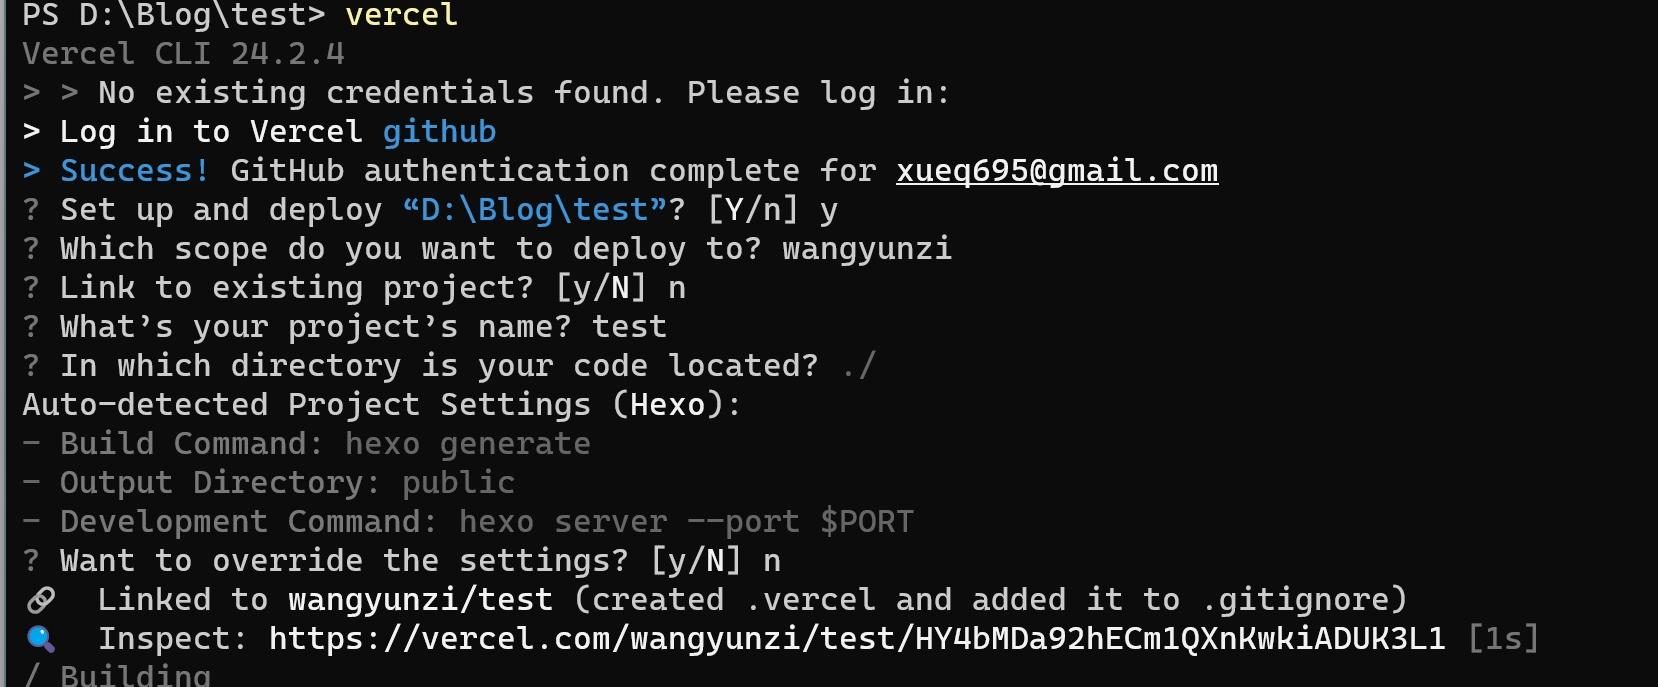
慢慢分析这些代码,success 表示用 github 登录成功,然后询问你是否需要将本地博客文件 test 上传,直接点击 enter,会询问你是否想上传到你的 vercel 账户,wangyunzi 是我的 vercel 账户名称,是否上传已经有的 vercel 项目,因为我没有在 vercel 上建过这个项目,我就直接填一个 n(NO),如果你已经建立了,就还是继续 enter,项目名称是什么,就和我们上面那个步骤一样,网址的名称,接下来一直 enter,稍等一会儿:
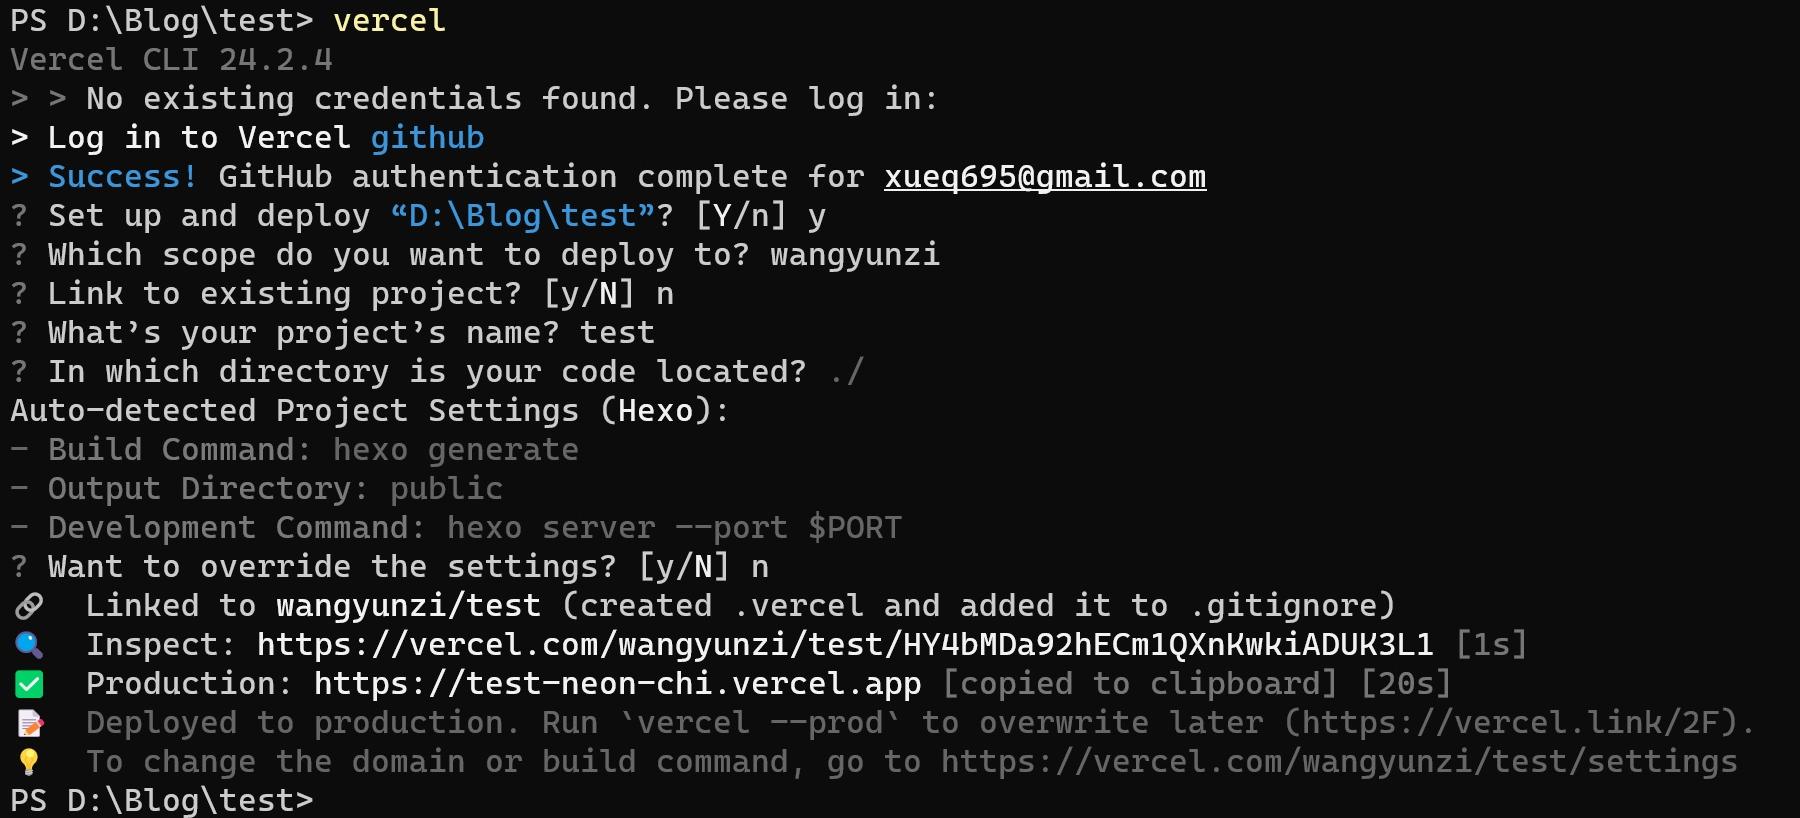
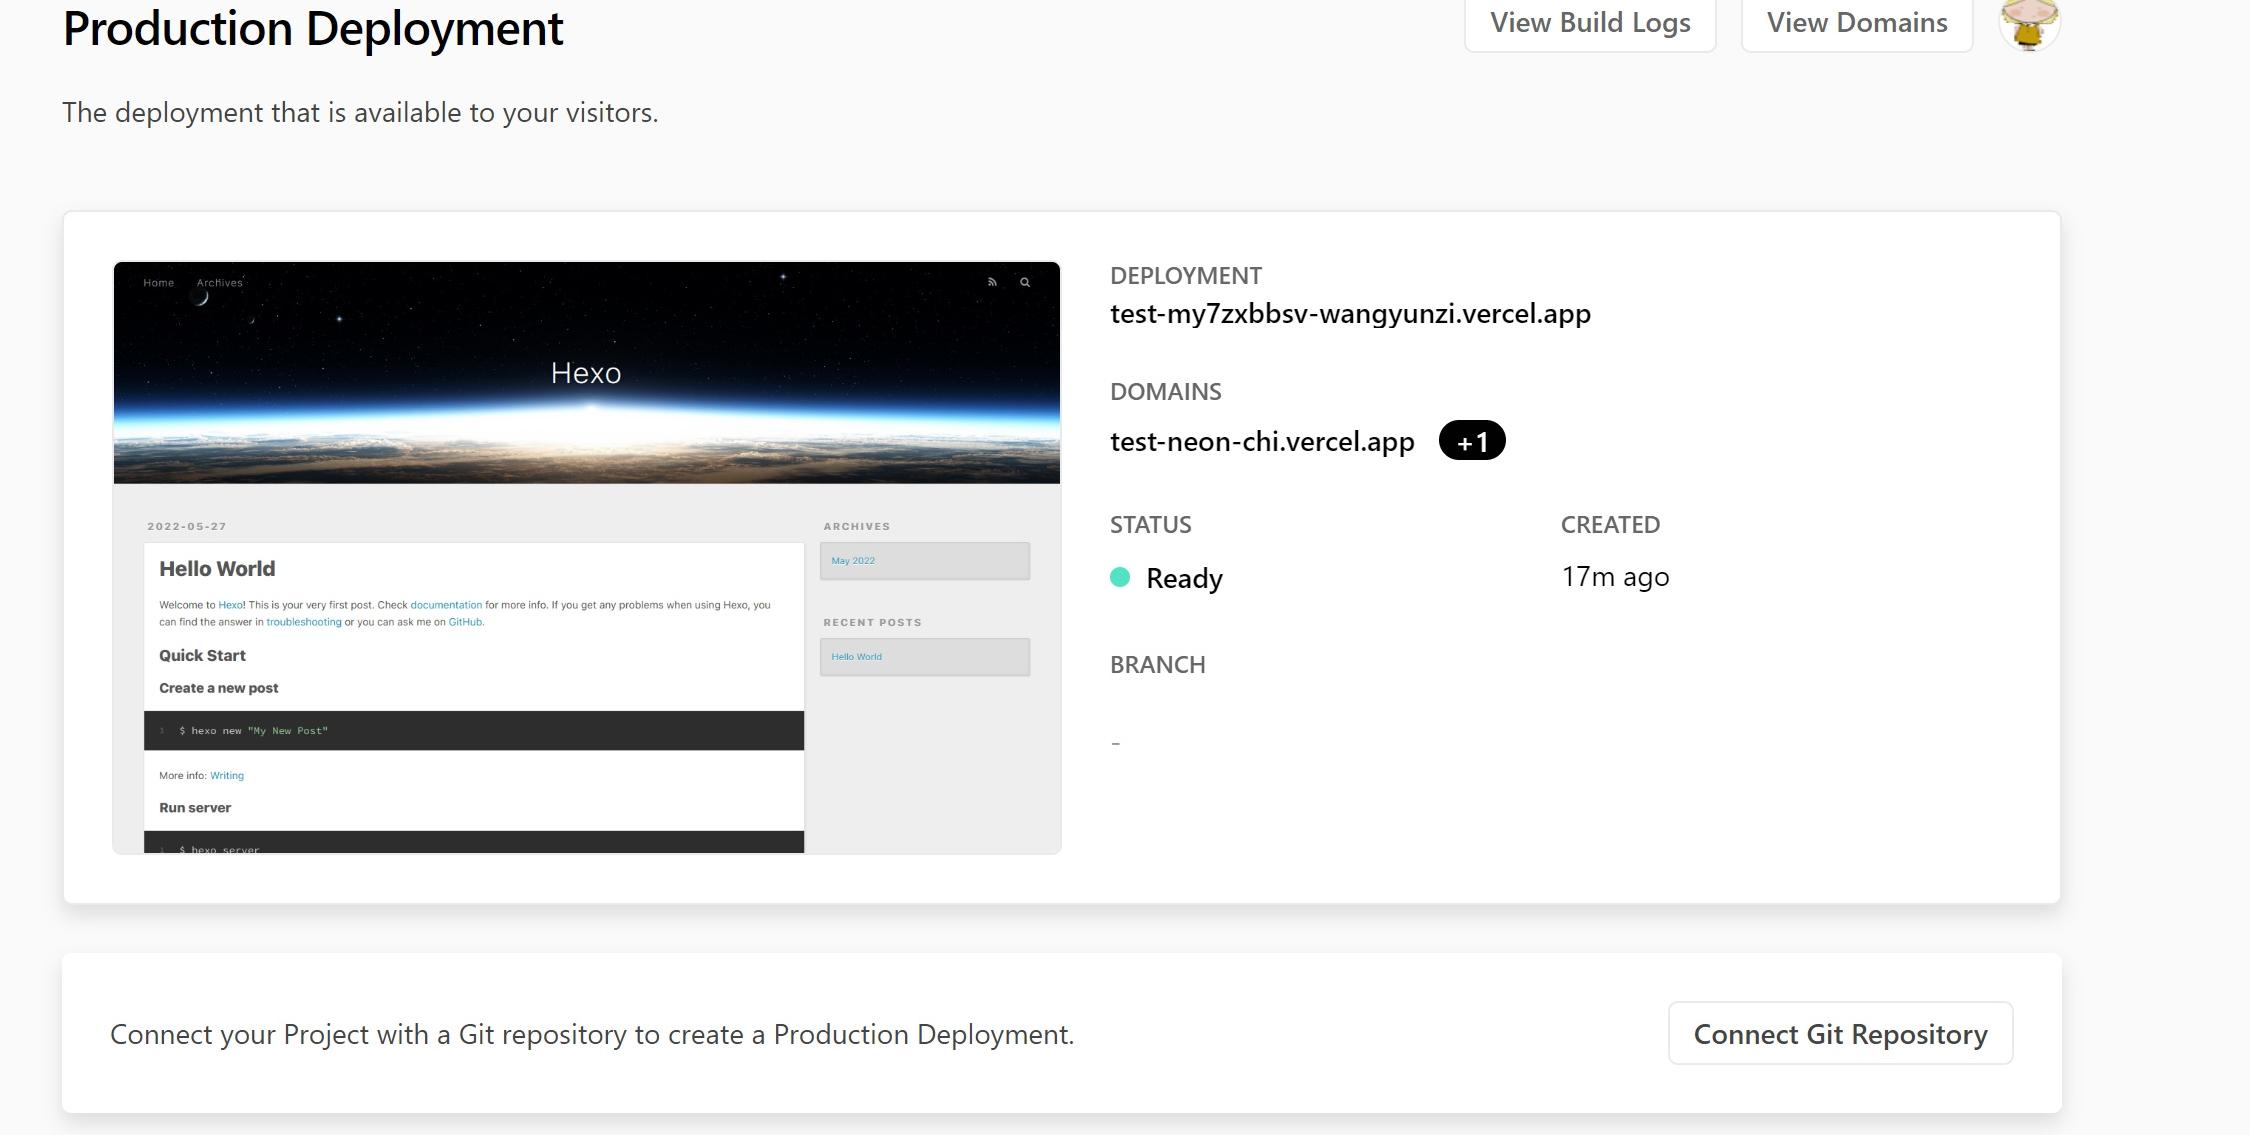
这张图片就表示我已经上传成功了,然后我们在我们的 vercel 页面来看看:
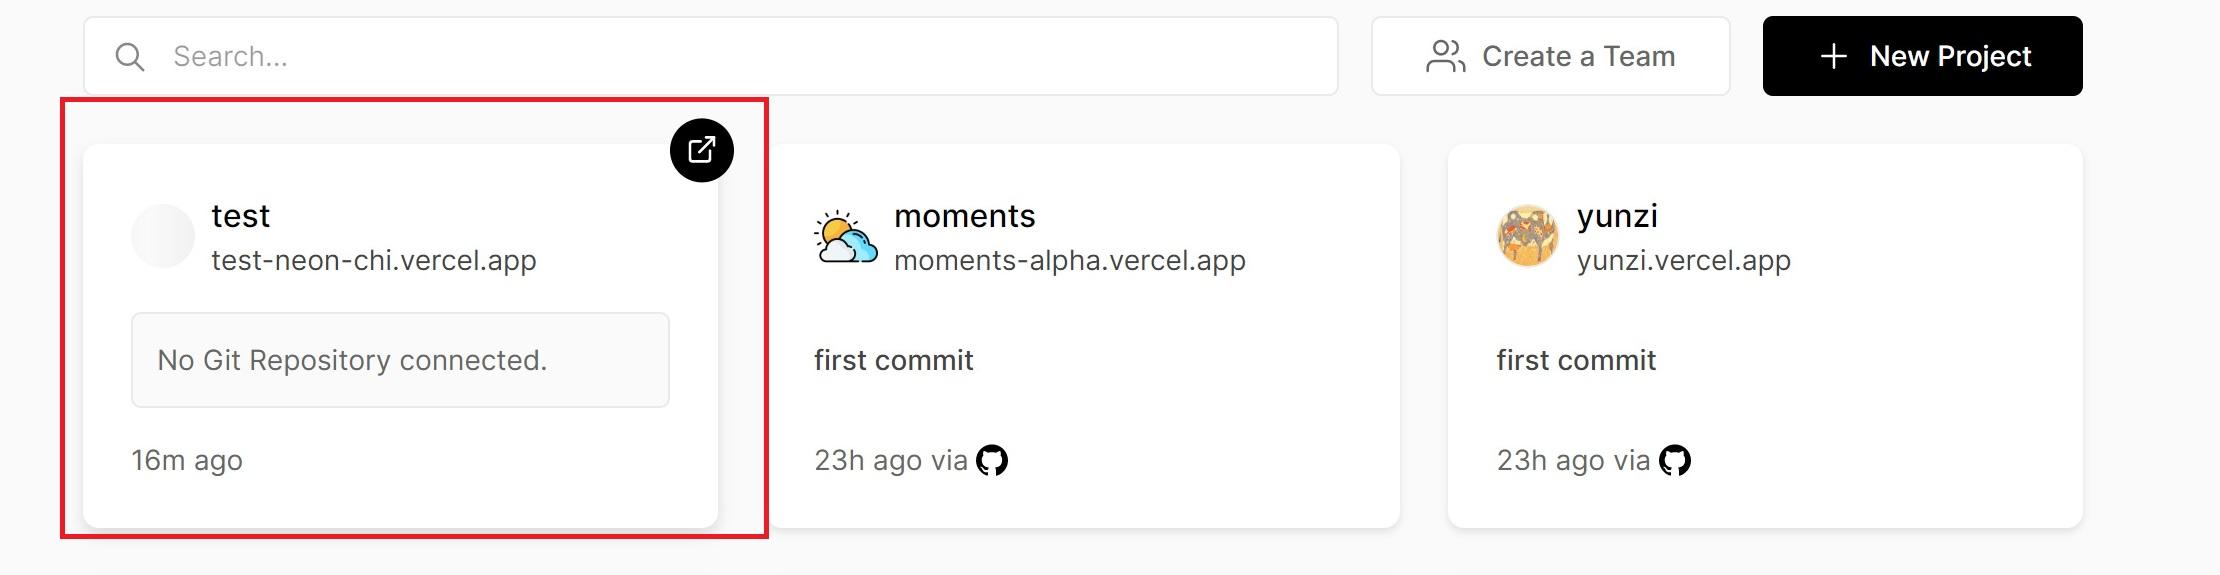
看来我的博客已经成功了哈,点击链接进去看就是我的博客啦!
4. 依次输入以下代码发表文章:
hexo cl
hexo g
vercel --prod --confirm
总结#
以上差不多就是我一整个 hexo 搭建博客的历程,虽然现在自己操作这些流程非常顺畅没遇到啥问题,但是像当初的我只要做一个步骤就会出现一个错误,一连串报错常常让我措手不及,浏览器打开的网页比我写论文时打开的网页都还要多😪,真真就是 “一把辛酸泪”。接下来还是会慢慢记述自己用 hugo 搭建博客和 notion 搭建博客的历程。其实对于我自己来说,弄这些博客的步骤都是比较混乱的一个状态,都是出现一个错误然后上网搜索一个错误,没有正常、完整的步骤,所以现在也算是一个复盘的过程,以便于自己日后若是忘记了也可以回顾一下。最后想对自己说,你慢慢回去删除那些因为需要演示建立的仓库以及截图的样子真美,写完一篇文章,桌面上布满了截图。
See you later!